Guide
How to Use
A quick-start guide to making the most out of Dynamic Prompts.
Video Walkthrough
Prefer watching to reading? This 3-minute video covers everything from creating your first prompt set to sharing it with others.
Step-by-Step Guide
1. Create a Prompt Set
A Prompt Set holds one or multiple prompts that belong together. When you are on your dashboard, simply click the New Prompt Set button.
Use the Tab Bar at the top of the editor to switch between multiple prompts, reorder them by dragging, or add new ones to your collection.
2. Use Variables
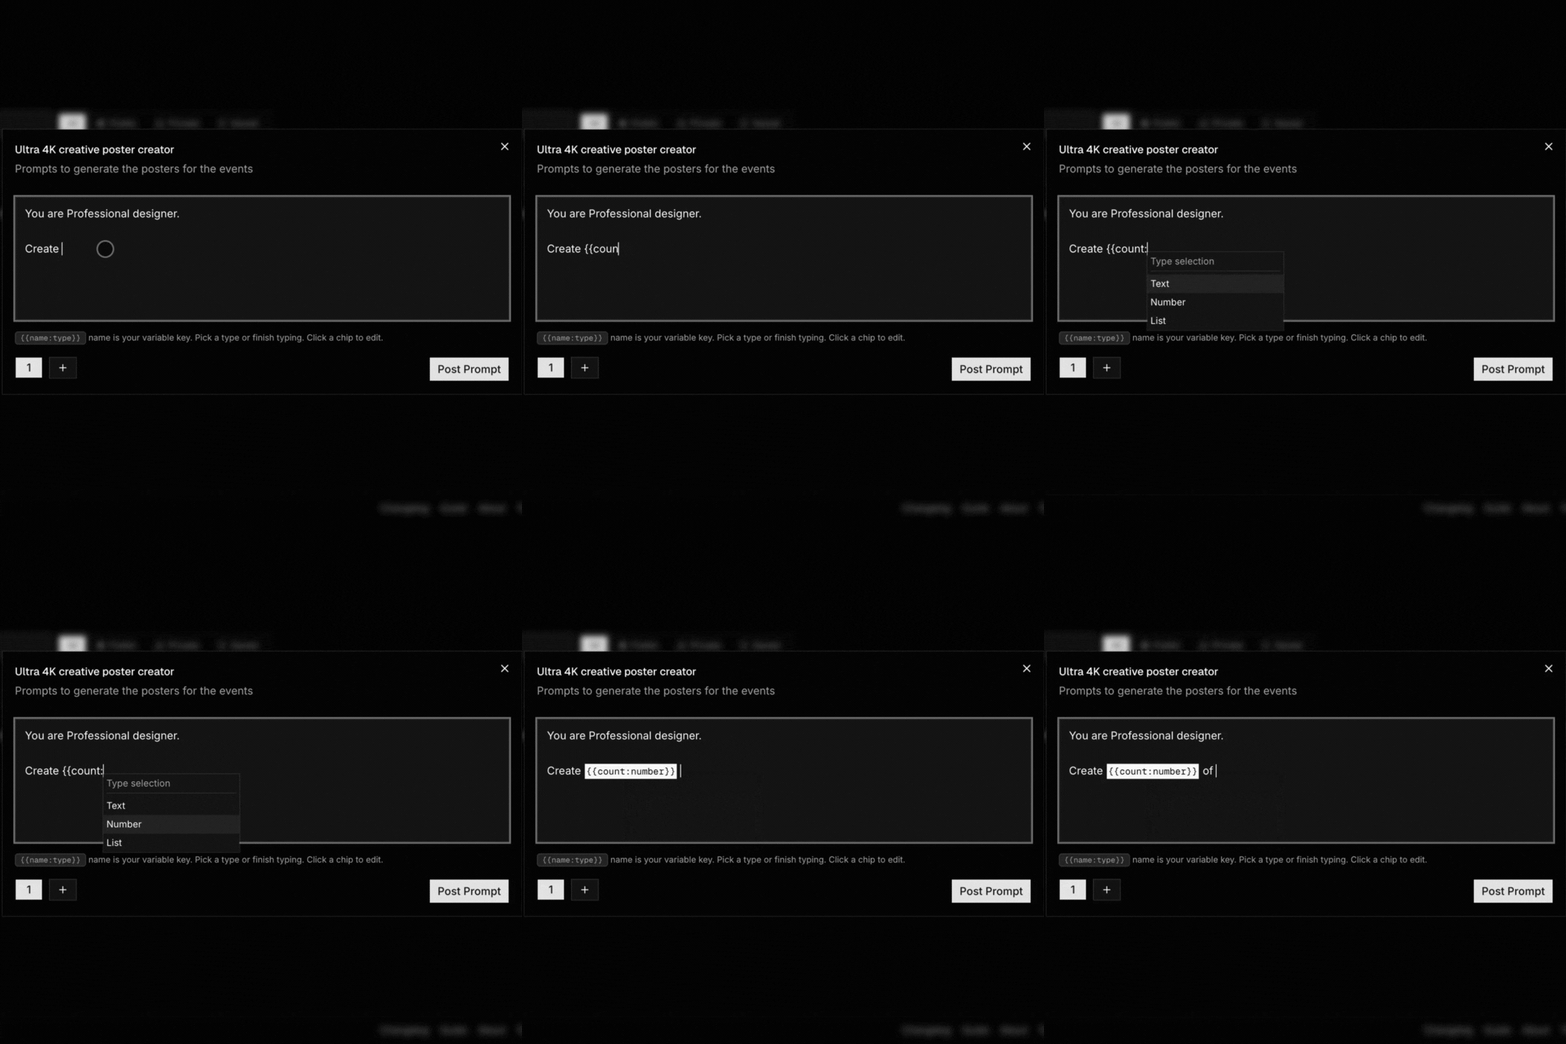
Instead of hardcoding details, use dynamic variables like {{variable_name:type}}.
Managing many variables? Use the Variable Library at the bottom of the editor to quickly insert existing variables from other prompts in your set. We'll even flag Configuration Conflicts in red if names or types don't match across your set.
Simple text for names, topics, or descriptions.
Numeric inputs for counts, ages, or quantities.
Add multiple tags (e.g. keywords) that get joined by commas.
Dropdown choices: {{tone:options[Funny,Professional]}}
3. View and Share
All prompt sets start out private to your account. To share a prompt set, go to the dashboard, click on the prompt options, and make it Public.
You'll be given a shareable link that you can give to your team or post publicly. Anyone with the link can view your prompts and open them in their browser.
4. Export to LLMs
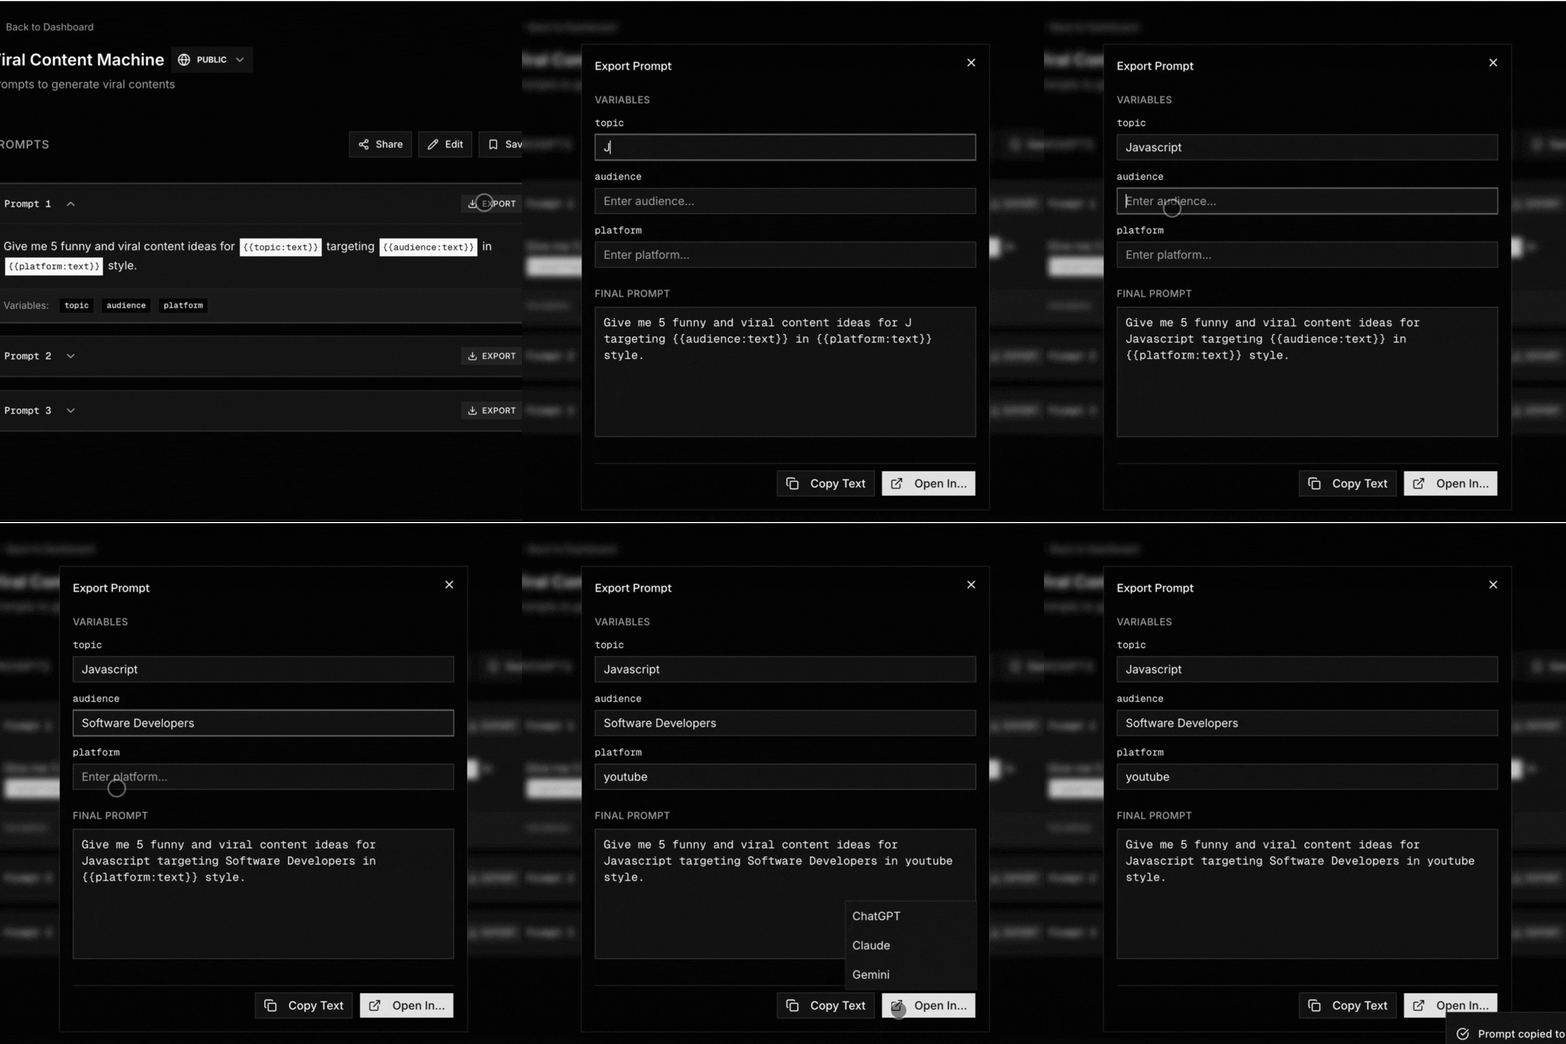
When you view a prompt, clicking Export opens a window where you can fill in values for your variables.
To ensure consistency, export buttons are only enabled once all variables are filled. Once ready, jump straight into ChatGPT, Claude, Gemini, Perplexity, or Grok with your prompt pre-filled!